Part 2 Drills
If you get stuck below, go back to the Part 2 lesson
untill you can do these without instructions.
Part 2 lesson
~~~~~~~~~~~~~~~~~~~~~~~~~~~~~~~~~~~~~~~~~~~
~~~~~~~~~~~~~~~~~~~~~~~~~~~~~~~~~~~~~~~~~~~
~~~~~~~~~~~~~~~~~~~~~~~~~~~~~~~~~~~~~~~~~~~
~~~~~~~~~~~~~~~~~~~~~~~~~~~~~~~~~~~~~~~~~~~
~~~~~~~~~~~~~~~~~~~~~~~~~~~~~~~~~~~~~~~~~~~
Track 12 is identical to Track 11, except it starts at a faster tempo.
Once you can get through Track 11, work on Track 12!
~~~~~~~~~~~~~~~~~~~~~~~~~~~~~~~~~~~~~~~~~~~
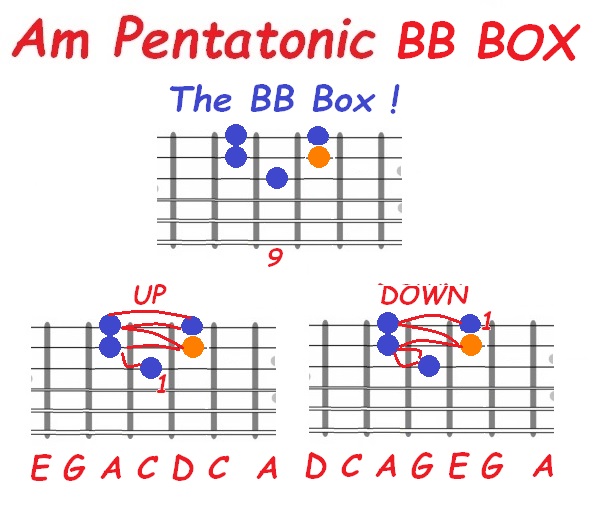
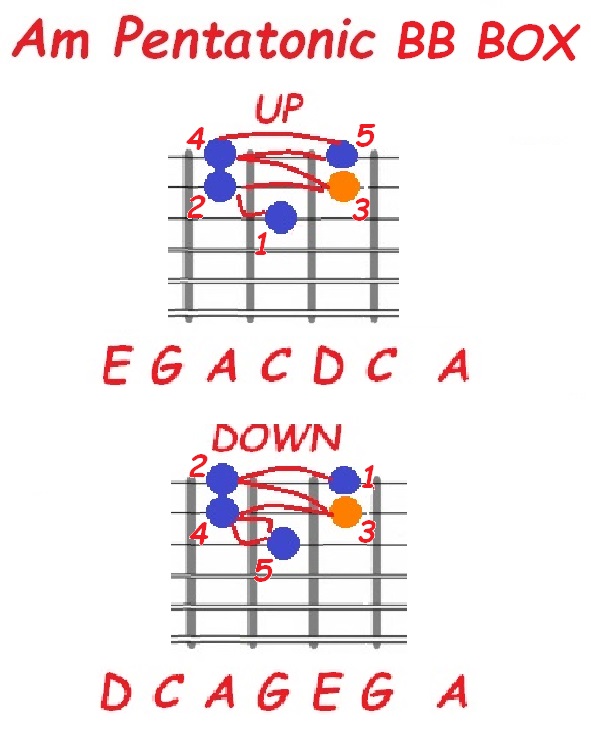
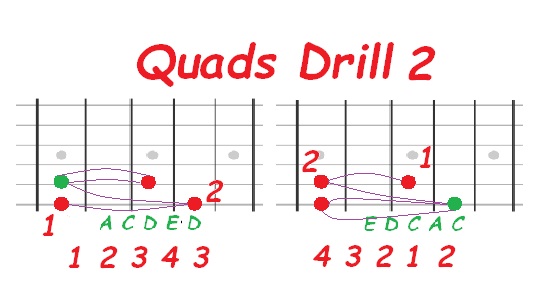
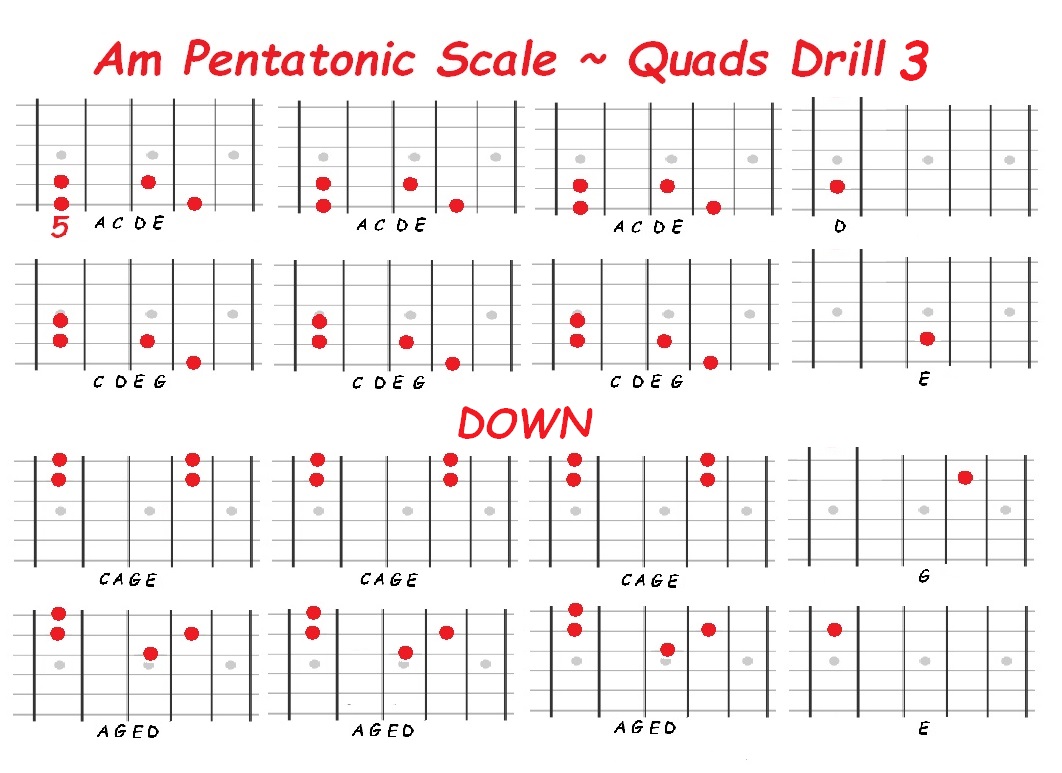
DOWN: 5 4 3 2 1 2 ~ 5 4 3 2 1 2 ~ 5 4 3 2 1 2 ~ 3
D C A G E G ~ D C A G E G ~ D C A G E G ~ A
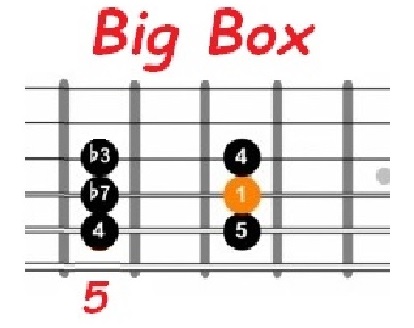
If you think this one was cool, wait till we add in
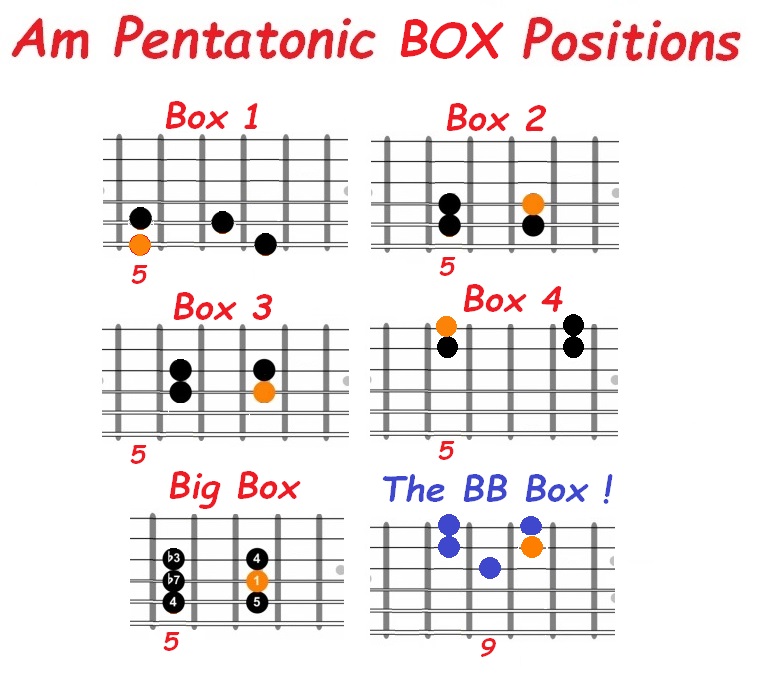
The Big Box!
the Albert King Box in Part 3!!!
~~~~~~~~~~~~~~~~~~~~~~~~~~~~~~~~~~~~~~~~~~~
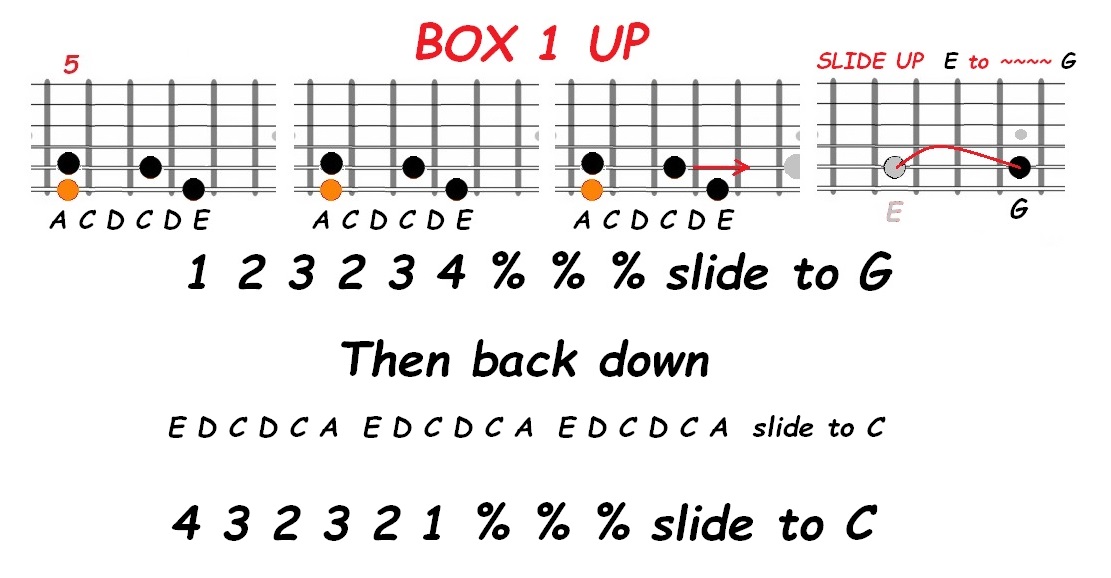
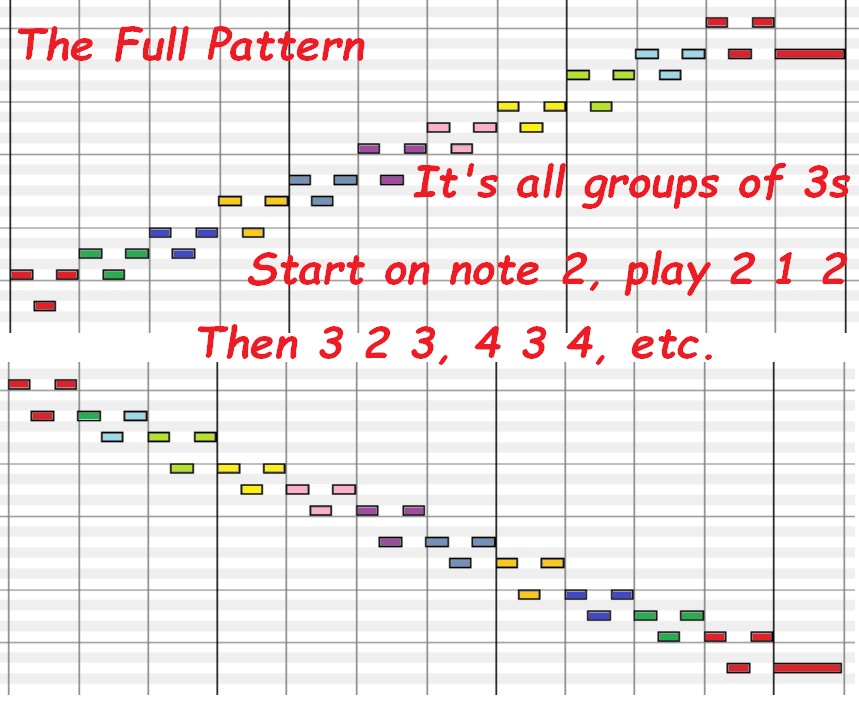
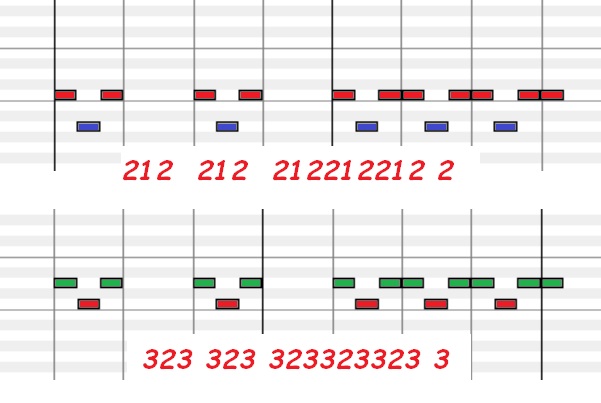
It's important you get this! It's the main building block for
the whole thing! Learn this pattern!
STAIRSTEP
UP
DOWN UP
UP & DOWN
~~~~~~~~~~~~~~~~~~~~~~~~~~~~~~~~~~~~~~~~~~~
Starting at the top of the scale,1st position, on C, finger 4.
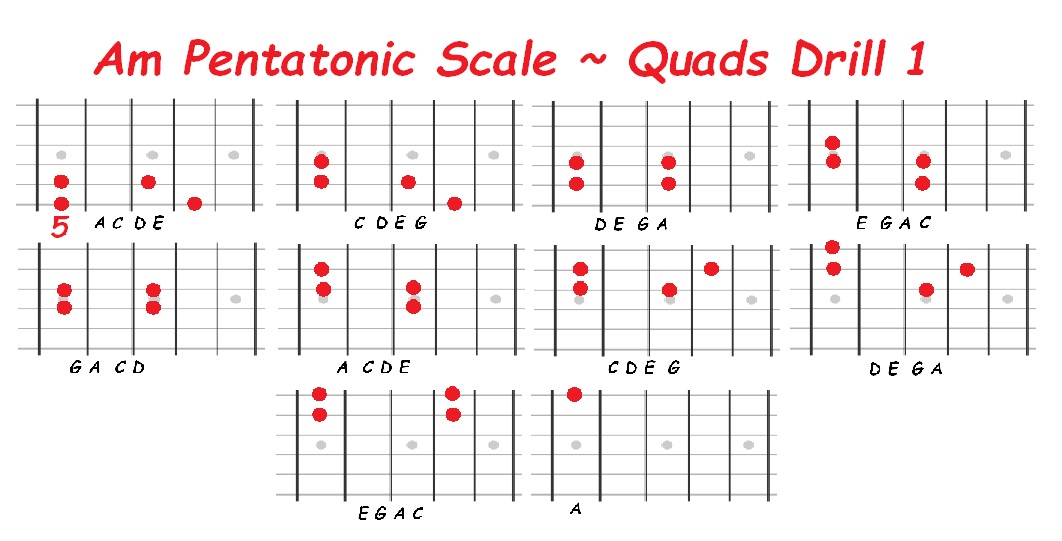
The 1st Pattern:
Pattern 1
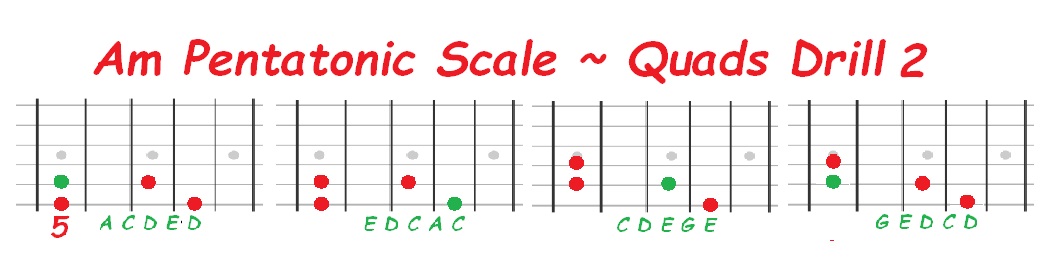
Pattern 2
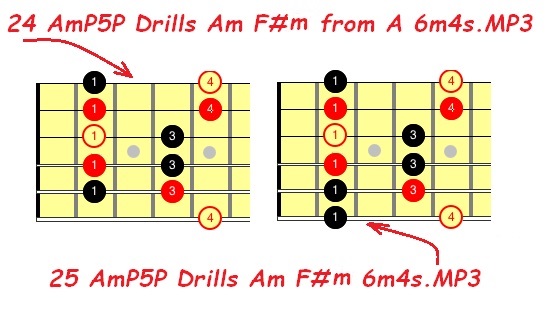
From A
From F# UP DOWN UP DOWN ALL UP, then DOWN UP DOWN
~~~~~~~~~~~~~~~~~~~~~~~~~~~~~~~~~~~~~~~~~~~

UP
Learn it! Do it now for the whole scale. No tempo changes. When you
have the pattern down, go to the next track. It could take a few sessions.
The whole Scale
SLOW
This one gets a bit more aggressive! Stay here until you nail it!
MEDIUM
Nail this one, and your concert tour contract is a shoe in!
JAMMIN' FAST!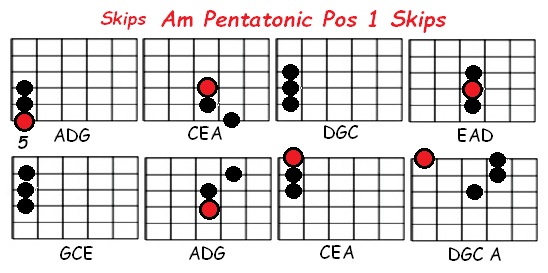
UP then DOWN
When you're ready, go here to JAM!
Back to the main directory
Please consider making a small donation to help us keep thewaynereedconnection
Part 3: The JAM WORKOUTS DRILLS! It's time to PLAY!
Contact me any time! Got a question?
Ask me! Or request a workshop topic!
Email me any time! ~/~
Wayne on Facebook
Directory Main Page
online. thewaynereedconnection relies on your help because we are not monetized!
Membership, and all of the MIDIs, KARs and BIAB files, and ALL
of the Tutorials and Workshops are FREE!
Thank you for your support! Wayne
Click the PayPal link if you'd like to help!