PEDAL BOARD TIPS!
EZPZ way to "make a board", "make a case", and mounting tips!

If you want to easily make a case for your board, be it for storage or
easy transport, here are some valuable tips! PLUS, there is a section
below that will show you an EZPZ way to mount your pedals to the board.
It's easy, fast! Secure. And really inexpensive! (Tip 3)
Making a pedalboard and building a case . . . at the same time! (Tip 2)
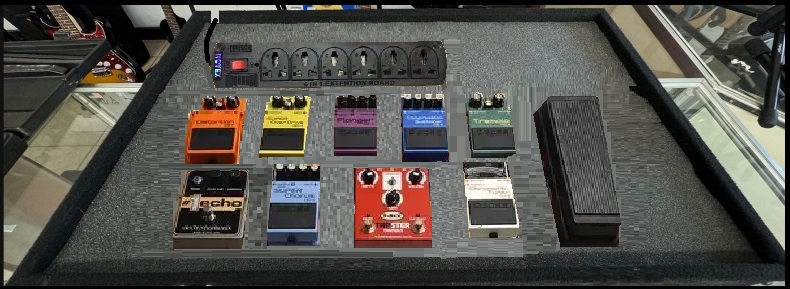
Here's a great example, made by Jefferson Candido, member of Lery's Facebook page.

Visit Lery's guitar page on Facebook!
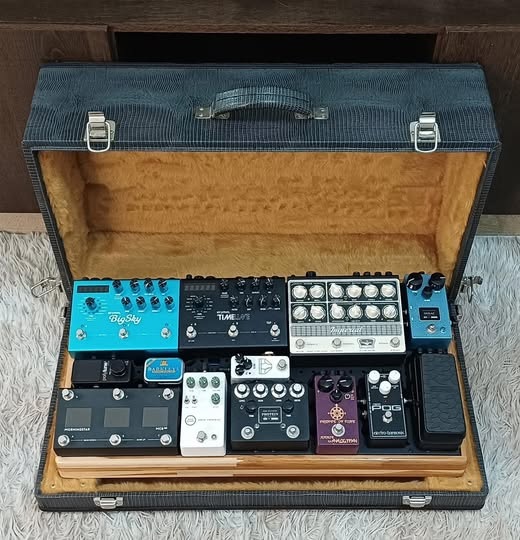
As you'll see below, this example could be done 2 ways. If the case lid is
removeable, (slide hinges) ~ or if you want to remove the hinges, and replace
them with slide hinges, then you can simply mount the pedals to the shallow lid.
Or you can mount them to a "board" that fits inside the case when closed. You
will need a padding! Piece of foam to place on top of the pedals so they don't
move around in the case during transit! You can glue the foam to the top
of the inner case. The actual case, the deep part, will be the TOP.
Tip 1: Making a pedal board "case" or cover / Making an EZPZ board with cover
(This would be for those who need to transport your board to gigs or jams!)
Lay out some cardboard on the floor or on a table. Make it larger than what
you feel you need. As in, considerably larger than the pedal board will be!
Lay out all of your pedals in the order you want them. LEAVE ROOM for
connecting the pedals. It's not a bad idea to actually connect them!
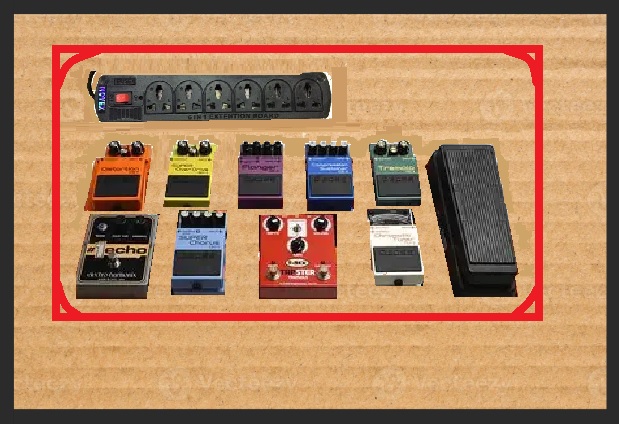
Get a Sharpie/marker, and a long straight edge and draw a box around
the pedals. Leave about 1" left and right, 4" top, and an inch or so
at the bottom. (Bottom being the closest row of pedals to your feet.)
Cut it out! Maybe round off the corners. Use a glass or cup and trace around
it to make a decent radius on each corner. Not huge! About the size of a silver
dollar. This will make it easier to set the template into a case, if you find
one with rounded corners, but is long and wide enough for you board!
NOTE: If your case has rounded corners, you'll need to cut off the corners of
the board you make! So it fits!
THIS will be your template! ALSO measure the height from the table top to the
highest/tallest pedal. Write it down on the template! Add an inch!
Leaving room for
at least a thin piece of foam!

Grab the template and a tape measure!


Now head over to the Goodwill or Thrift Stores in your area, and look for
used suitcases, trunks and flight cases. Bring the template with you! Use
it to find a case that the template fits into. Measure the depth of the
inside! Lid and bottom! Make sure it's deep enough so when you close the
lid, you have enough space to add a padding on top of the pedals to take up
any slack space (so the board sits firmly, and can't rock or move around
when the case is closed. You can use a folded blanket, thin pillow, or a
piece of foam!
This case will be your pedalboard case! Just set your pedalboard in the case!
You'll need padding for the sides, too, if the case is longer than the board
is wide! You don't want the board "moving around" in transit!
And it doesn't matter much what the case looks like! Just spray paint it!
Tip 2: This is similar to #1, except this time, the case will become your
pedal board! You'll use the shallow lid as the BOTTOM. As in, the lid sits
on the floor. (Ideally, find one with a SHALLOW lid!) Mount your pedals to
the inside bottom of the lid.


Remove the hinges. Hit your local hardware store and buy a set of hinges that
"come apart"! Like, open the case, and slide off the deep, main case off of
the lid! At a gig, you just lay the case down with the lid, down. Open it,
Slide off the big case part. BINGO!
If you do this, you want to add enough room at the top so you can fasten
a power strip! Ideally a power conditioner, like a Furman! And cut a slot
so the electric cable from the power strip can lay flat on the floor when
you set up! You don't want to trip over it!
When the gigs over, unplug the power supply. Lay the cable over the pedals,
and slide the case cover back on! Close the clamps. DONE!
What you're going to do is use the LID of the case as your board!
Mounting Your Pedals - EZPZ!

A little dab'll do ya!
Pick up a quality glue gun from your local hardware store, not a craft
store! Get one that uses larger glue sticks, not the skinny ones!
Once you place all your pedals where you want them - AFTER dialing them in,
just tip each pedal, one at a time, stating from the 1st one in your chain.
Run a thin bead along either the 2 long sides, or 2 short sides, or 1 of
each. Rock it back down, make sure it's lined up straight. You have a few
seconds to "wiggle" it in place. Then press, not HARD!. Hold in place for
about 10 seconds. RETEST IT! Does it work? If not, check the cables. If so,
go to the next one.
You can also, INSTEAD use a dab on the corners! Works just as well. If a pedal
has stick on feet, either remove them, or put a dab of hot glue on each one.
That'll work fine. If it has higher screw on feet, same thing. Fill the screw
hole. Wait about 10 seconds. Then add a dab on top. Position, align and press,
hold. It's literally that simple.
For larger pedals, or minis, you can put the glue on the bottom surface. Minis
don't need much. Large pedals, maybe 2 quarter size "blobs"!
To remove them later, to swap out a pedal, just give it a firm twist. It
should pop right off! There's a bit of a learning curve. How much is too
much, or not enough? If the pedals are coming loose, then it wasn't enough.
Use a LITTLE more next time. If you have trouble getting them off when
needed, you used too much.
You can easily remove stubborn pedals by applying a little heat with a hair
blow drier. A heat gun works great, but you need to be carefull not to get
your pedals HOT! Hair driers don't get HOT!
NOTE: You can do this on any board. BUT . . . if the board main surface has
Velcro, or a "rug", you should remove it! The glue REALLY hold fast to a rug!
You'll have a tough time getting the glue to "let loose"! (Heat helps!)
There you go! Did you got some inspiration?
~*~
Back to the Tutorials & Workshops Directory Page ~*~
Check out the new "Short Read" tutorial, Series vs. Parallel Signal Chain!
Make your board sound more responsive, more dynamic, go parallel!
The difference is AMAZING!
Hope you found this interesting. If you did, please feel welcome
to drop me a line. Email me, or drop me a PM on Facebook!
Email me any time! ~/~
Wayne on Facebook
My Band Website
Check out my Support Group
I Just Wanna Play The Darned Thing!
My main backing Tracks Support Website with 43,813 free bacing tracks!
SoundFont, MIDI editors and players and more! All distributed for free!
![]()
Visit my MIDI website!
Please help keep us online with a small donation!
This site is free for all. The tutorials, workshops. 43,813 MIDI, KAR &
BIAB backing tracks files, 23 BIAB User Styles. A FREE SoundFont,
Timbres of Heaven. Free MIDI players and editor!
The fees for a site this large (Nearly 200 pages with over 50K files)
is pretty high, as you can imagine.
Please consider making a small donation to help keep us online. It
would help so much! Thanks! Wayne
PS: I pay for the site and all hosting, security and domain related
expenses out of pocket. Donations appreciated. Please click the link below.